Wednesday, November 16, 2016

Pig Days Coming


We woke up this morning to snow on the hills around us; quite suddenly, the weather we need is here. It's been an agonizingly warm fall, with early November rolling from 60-degree day to 60-degree day with 45-degree nights between. I don't usually agonize over day- and nighttime highs and lows, but to butcher pigs without a walk-in-size refrigerator, the nights must be between 32 and 40 degrees. So we agonized, and the 45-degree nights stretched seemingly endlessly from early September until now.

At last, there is snow and cold (and even maybe too much cold, the irony of which I cannot bear), and we are ready to go. Tomorrow. 

***


Our two pigs are bordering on gargantuan these days. They've lived out a luxurious life in the woods near our house, feasted on organic grain and hundreds and hundreds of pounds of apples and pears (a steady stream since August). When I feed them in the mornings, I catch myself analyzing their legs and bellies. There's some serious ham and bacon under there. I'm only a little sad to see them go. All along, their purpose has been to live well, get huge, and end up in our kitchen. To us, it is a very satisfying and rich process. In these days of mass-produced and mass-slaughtered meat, of animals raised in tight and terrible quarters, of impersonal vacuum-sealed packages of flesh, this is something different.

I have found there's nothing like raising your own animals to inspire passion against the commercial meat industry.

And, true, to generate a lot of work.


***


It's been two years since our last pig slaughter on Vashon, with our friends John and Bri. Since, we've butchered a lamb, a ewe, and two goats, plus a lot of chickens, but pigs feel like another level, another realm. Not only because our process over the next three days includes a 20-gauge shotgun, a tractor, a chain hoist, a 55-gallon food-grade barrel, a propane burner, our sharpest carbon-steel knives, two KitchenAid mixers, a sausage grinder and stuffer. There's the complexity of the kill and stick, and the precise 150-degree temperature of the scald for scraping, and the 12-page cut sheet detailing our butchering goals to deliver pork to my aunt and uncle, parents and sister, our own freezer, and our charcuterie room.

Did I mention we are tackling 12 different charcuterie recipes, from pate and smoked bacon to coppa and prosciutto?

My project-management brain has been in high gear.

I am hoping and praying that our preparations and discussions and, yes, mishaps and miscommunications over the last two months will give us a solid framework for the next three days of work--so we can relax, let our rehearsing take over, and dig into the work together. I deeply want to be able to savor the process with Tim and everyone who comes to help.

Then, Sunday, we can rest. And eat pork chops.

Wednesday, September 7, 2016

The Harvest Garden

Oh, fall, you came so fast. One day it was 90 degrees and the next dreary and rainy and we needed a fire. 

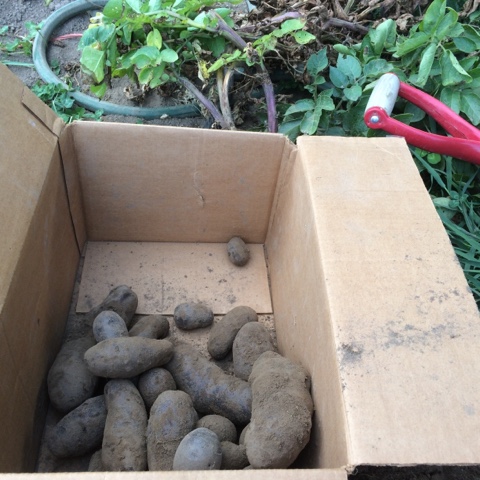
The garden is a weird mix of peak and dying now. The eggplant and peppers and tomatoes and zucchini are churning along at near-full force. But in the last few weeks, we've dug all our potatoes and harvested all our shell beans and onions, finished off the broccoli and most of the cabbage, brought in all the carrots—and the garden has more empty spaces than green growing things. Plenty of the green things are weeds; I gave up on that front in July. Also the sunflowers are all falling over.

Not a super pretty picture, but a satisfying one, actually. We are ready for a season of rest out there, and it feels just delicious to have a houseful of stored winter things in cupboards and closets. Now we can turn our full attention to the pigs, and the process of bringing that winter food into the freezer. 


Wednesday, August 31, 2016

Zucchini and Purple Potato Fritters

It's been a summer of fritter obsession. Weeks ago, we fell hard for zucchini fritters and ate them somewhat nonstop for an amount of time that I shouldn't fess up to. There was something about pillowy zucchini fritters with slices of juicy fat tomato on top, and cold beer on the side, that was so right for the endlessly hot days of August. 

Then, a few days ago, I discovered potato latkes and tumbled into another obsession—crispy crispy fried potato with the softest middles. Paired with nothing. Gobbled. And, probably not a good thing, so easy to make with ingredients we have an abundance of: egg, potato. 


We're in a crossover season, the blurring line between two things, the liminal, as I think a poem I loved on England Semester called it. Still tons of zucchini, eons of green tomatoes, and light long into the evening. But the garden is emptying, and all of our potatoes are in the garage, and today it was cool enough inside to want a fire in the wood stove. 


It is relentless and unavoidable, and so I give in. Okay, fall. Welcome. 

But today for lunch these fritters straddled the divide, one foot in summer, another in the season to come. It's zucchini fritters meets potato latkes: soft inside, crispy out. Delicious with cheese and garden tomato, or plum-cardamom butter smeared on top. Warming, and an ode to the zucchini days of summer. 


Two pounds zucchini, potatoes, and onion, grated. Don't fret about the ratio. Make sure the potatoes are amethyst purple, for fun. 

Add two teaspoons salt and let sit over a strainer for 20 minutes. Then press firmly with a spoon or your hands to squeeze out as much liquid as you can. Honestly, I cannot bring myself to dirty a dishtowel by wringing out the veg in it. 


Add two eggs, 1/2 cup flour (I used Bluebird Grains Einka) and 1/2 teaspoon baking powder. Mix. 

Fry in coconut oil in a hot cast iron skillet, 4 minutes per side. Keep them warm in a 250 degree oven, right on a sheet pan lined with foil, or a sheet pan lined with a wire rack if you prefer. 

Consume twelve 3-inch fritters with summery or autumnal toppings, wherever your heart lies these days. 


Tuesday, August 30, 2016

Quick Red Wine-Plum Sauce


After I harvested 40 or so pounds of plums the other weekend, I felt done with plums--so over stirring plum jam, content with the amount of plum butter in the pantry, and ready to move on.

But I didn't know that Italian prune season hadn't even begun yet. And seriously, they fall from the sky into the kitchen, and I just can't seem to say no or give them to the pigs.


Italian prunes, happily, are much simpler to process than the clingstone plums we've worked through earlier this summer. They are freestone, which means you make one short slit with a knife, pull the halves open with your fingers, and pluck out the pit.

Lsat night, we started a dehydrator full of them. Today, more plum butter. Both of those are starting to feel routine, but the plum compote Tim suggested we make last night has reinspired my feelings about plums. I do love plums. We used it on salmon, and tonight I think I'll try it again with goat. It's sweet and tart at the same time, and would be delicious on anything from chicken to pork to steak. Best of all, unlike dehydrated plums and plum butter, it takes barely any time to make.


Start by dicing up some plums. Maybe three to four per person. 


Put them in a small sauce pan, and add a glug of red wine, enough to cover the bottom. 


Throw some diced onion and a sprinkle of salt on top. Cover and simmer over medium-high heat for three minutes, until the plums are soft. Take off the lid and simmer for another three or four minutes, until you can drag a wooden spoon across the bottom of the pan and the red wine won't rush back in to fill the gap. The onions will be somewhat al dente, which I liked as a contrast to the soft and collapsing plums.

Stir in a pat of butter, and serve.  

Saturday, August 20, 2016

Apple-ing, and Quick Preserving Tricks


As we picked apples the other day, I was thinking about a verse in Psalm 1: the one whose delight is in the Lord is like a tree planted by streams of water, that yields its fruit in season.  

That phrasing sounds so modest, until you see a monstrous mature apple tree—and "yielding" becomes heavy with fruit, churning out pounds of it by the hundreds, fruit that is crisp and sweet and flawlessly white when you cut inside. Fruit that you can pick sixty pounds of without too much effort or time on a sunny summer evening. 


We're just now emerging from three evenings of processing the apples, long hot evenings of coring and chunking, cooking and blending, and boiling and boiling water. It's not a bad way to spend a summer night, especially if you blast some Etta James, drink cold beer, and consume massive amounts of zucchini fritters and fresh tomatoes for sustenance.  


For most of the last few weeks, though, we haven't had the time to devote to canning marathons like that; we've had a steady stream of summer guests and activities. Vegetables may be expiring on my counter, but people must also be fed--now, not in the fall! And of course I yield to the call of outside summery things like hiking, river rafting, and plain old relaxing in the front yard with family, dogs, and glasses of fresh iced apple juice. 

But still, those vegetables call to me for help, and I'm loathe to just let them totally expire on the counter. Here's what I've tried so far that is fast and, unlike canning, very easily multitasked: 

Zucchini
Cut the blossom end off, but leave the stem end on for a handle. Grate it up on a microplane (or with a food processor grating attachment, but I lost mine in the move and have found that a microplane takes hardly any time anyway); use the stem end handle with caution so you don't grate off your knuckles. Steam blanch for 1 or 2 minutes. Portion into ziplock bags, zip closed, and immediately dunk in an ice bath to cool. Freeze--and have zucchini fritters year round! 

Tomatoes 
Our tomatoes are ripening so slowly right now, and I'm harvesting just a handful of the paste varieties at a time. Not enough for a big canning to-do, and anyway, I've sworn off tomato canning for the year; I detest seeding and peeling them. My favorite way to small-batch process them is this: Chunk up as many as you have, heat in a pan until soft and juicy (about 10 min), and immersion blend. Cool and freeze. I did just enough for a quart ziplock this afternoon while I made some lunch. No time at all, and the tomatoes are saved! Phew. 

Cucumbers 
I've recently become so obsessed with eating pickles at lunch (with cuts of smoked salmon, slabs of cheese, a hardboiled egg, and cherry tomatoes) that I seriously must can more, or else we will run out in October. But sometimes there's no time for that, so I've been fermenting them. 

You don't even need to chop the pickling cucumbers (or you can, if they are bigger than 5 inches). Just wash them gently, pull off any blossom, and layer them in a half-gallon mason jar with some pickling spice, garlic (don't peel, just cut in half), and grape leaves. Cover in a brine of 1 quart water + 3 tablespoons salt, and make sure the pickles are submerged; a half-pint jar fits perfectly in the mouth of a half-gallon jar as a weight. Place a dish towel over the top. Leave on the counter for a week or so, until the brine is cloudy and the cucumbers look like pickles. Move them to the fridge, where they'll keep for a long time. 

What I love about this is that you don't need a recipe, or any measuring utensils, or any specific amounts of anything. Small batch it, big batch it, do it while you make dinner. 

Celery 
We didn't grow any, but our landlord gave us a bag of beautiful stalks the other day. You can chop and freeze them without blanching--leaves included. The fragrance of celery leaf perfumed the whole kitchen as I bagged them up. Use in soups and stews in the wintertime. 

Berries 
Spread them whole in a single layer on a sheet pan, cover with plastic wrap, and freeze for a few hours. Then transfer to gallon ziplock bags. There will be plenty of time to make loads of blackberry jam in the winter... 

What else? What quick-preserving ideas have saved your veggies this summer? 

Saturday, August 6, 2016

Fennel Frond Pesto


It's the time of year I dream about. The other night we made chicken soup with carrots, potatoes, turnips, fennel, and summer squash, and the only ingredient that we didn't grow--counting the chicken--was the tomato paste.

I love fennel, cooked and raw, and so I am slightly sad that the bulbs in this year's crop turned out pretty shrimpy. Not enough sunlight? But the fronds are tall and thick and green and gorgeous. So, since the freezer is nearly out of nettle pesto from earlier this spring, I made some fennel frond pesto.

Smeared on homemade bread and covered with juicy jaune flamme tomatoes and crisp lemon cucumbers, it made the most perfect al fresco summer dinner.

Fennel Frond Pesto 
Makes about 2 cups
When I make pesto, I go by taste rather than by any recipe. I kept track generally of the amounts I used, but keep tasting and blending, tasting and blending as you make the pesto, adding more of anything as you go.

Fronds of 3 small fennel
Bulb of 1 small fennel
1 cup almonds (toasted, optionally; I did not)
1/4 cup parmesan cheese chunks
2 to 3 small garlic cloves, peeled
Juice from 3/4 lemon
1/2 teaspoon salt, plus more to taste
Pepper to taste
1/2 to 1 cup olive oil

Blend up the fennel fronds and bulb in a food processor for about 30 seconds. Add the almonds, parmesan cheese, garlic, lemon juice, salt, and pepper, and blend until the almonds are finely ground and don't crunch obviously in your mouth when you try some. With the blender running, add the olive oil until the pesto swirls in a smooth, continuous wave around the food processor bowl (no big balls of green rumbling around). Blend for another minute or two. I found that this pesto needed more blending than a basil or nettle pesto, because the little feathery fennel fronds took a while to not be a feathery texture in my mouth when I tried a bite.

Taste the pesto, adjust the lemon juice, salt, and pepper as needed. Blend some more. Let the pesto sit for at least 10 minutes before you use it for the flavors to meld together.

Serve as a bread spread with tomatoes, cucumbers, and/or feta cheese; toss with pasta; or freeze in an ice cube tray, then transfer to a freezer bag, where it will keep for a few months.

Saturday, July 16, 2016

Spring in July

July 5 came and went, and summer forgot to show up. From a distance, the garden looks lush and jungle-like and summery. But from close up, some of it's languishing in this cool damp weather. Time for a sun dance? 


I'm still trying, and generally succeeding, to focus on the positives, what we are eating and enjoying rather than what has done poorly or just plain neutrally. We have more than enough produce, haven't bought vegetables at the grocery store in weeks and weeks. But still, taking a long hard look at everything on harvest days makes me cringe. 

I guess it's just a lot to manage for two people with day jobs (although I feel weird using that word, which probably has the wrong connotations for our jobs). Besides the daily tasks of watering—or not, this month—and every-other-day harvest schedule, there's the monumental job of keeping the weeds down, monitoring the health of everything, and then the constant looking ahead, managing the jigsaw puzzle of what will fit where next. Like, summer hasn't even happened yet and we're already planning the fall and winter garden. Basically, every time I'm out there these days, I feel terribly behind. Also happy, so very happy. It's confusing. 

On top of it all, thirty pounds of plums fell out of the sky and into the kitchen this week. Just like that, out of the blue. I conquered my fear of canning jam and even ventured into two-pans-of-jam-at-once territory, and dispensed plums to freezer, cobbler pan, friends, and pigs. The pigs like them just as much as we do. 

There's still a couple of pounds of them ripening in bowls on the counter, but I feel mostly in control again. Although who knows, the same thing might happen again next week. 


Saturday, June 25, 2016

Watermelon Mint Sorbet


"It's been a gloomy, rainy June," said Tim the other night. His first really gloomy, rainy June in Washington—the last four Junes since he moved here have been so sunny and warm that he's never believed me that gloomy and rainy are usually synonymous with June, and summer doesn't start until July 5.

I'm ready for the sun to come back now. So I'm trying to lure it back with summery things like this watermelon mint sorbet. I don't have an ice cream maker, but I recently discovered that's so not necessary when you start with frozen bananas. Has anyone else tried one-ingredient banana ice cream? Its worth a try if only to watch the transformation of chunky bananas into smooth and creamy stuff that looks exactly like ice cream, and then to eat it and try to convince your mouth that yes, this is only banana. I found it so rich and sweet that I could hardly finish a one-banana serving. Weird. But it's a perfect base for less creamy fruits like watermelon, and jazzed up with some fresh mint and lime juice, this sorbet tastes just as good on a dreary summer evening as a hot one. 


Watermelon Mint Sorbet
Makes 4-6 servings 

2 pounds de-rinded watermelon (this was a quarter of a giant watermelon for me)
2 bananas, sliced thin
1/2 cup chopped mint
3 tablespoons lime juice 

Slice the watermelon 1/4/-inch thick and cut the slices into small pieces. Line two sheet pans with plastic wrap and lay watermelon and bananas out in a single layer. Cover them with plastic wrap and freeze them for 3 hours, or overnight (the watermelon freezes solid in an hour or less, but I found the bananas needed longer than that). 

In an 8-cup food processor, blend half the frozen watermelon and half the frozen bananas with the lime juice and mint until smooth and sorbet-like, about 4-5 minutes. Add the remaining watermelon and bananas in small amounts and keep blending until super smooth, another 4-5 minutes. 

Mine was the consistency of soft serve at this point. You can return the sorbet to the freezer to harden up again, or eat it right away. 

Mint flecks: I don't really mind the mint flecks, but I think starting by blending just the lime juice and chopped mint in the bottom of the food processor, then adding half the fruit, would get the mint smaller or even make it disappear. 


Friday, June 24, 2016

A Hack Photo Studio, and Attempts at Food Photography

I don't post photos from the kitchen here often, if ever. Food photography has always felt way out of my reach. I can wield my iPhone camera outside when I want to, but I have always been intimidated by the flashy props and chic styling that every food blogger seems to use, and baffled by how to harness the powers of natural lighting. My house is under giant trees. On most days, except perhaps in the summer, there is very little good natural light for taking pictures of food.

But. Recently, I vowed to dip my toes into the ocean. Now I can't even remember how it started, but the other day I found myself deep in the Google hole of food photography tips, mainly just trying to find out how to rig a hack studio for cheap.

My new "studio" is a hack of the hack and cost $23. A 500-watt halogen work light sits behind an eviscerated cardboard box plastered with a cut-up Value Village t-shirt stuck to the box with some double-sided stickies (from a box of stick-to-the-wall hangers that happen to pull paint off my walls and have been sitting on my desk since, um, we moved). Two big white pieces of cardboard act as reflectors.


I was kind of nervous as I set it up, remembering Pinterest art project disasters of years past. But amazingly, it worked--in that it provides a neutral, clean light source. A blank slate. Really, a whole new world: now that I have good light, I can fiddle with shooting photos of the recipes I make at home all the time, and then share them on the blog, which I've avoided doing purely because of the photo barrier.

I'm going to keep it low budget. Maybe I'll take a trip to Value Village for ten dollar's worth of props--some colorful dishes, some simple white plates, some metal measuring cups (mine are plastic and I don't like looking at them in real life, let alone a photo). But that's all. This is an iPhone camera type of studio.


So I like the light, but the whole food styling thing feels really foreign to me. Like, the photo above is so unnatural. That is not how I make eggs. I did not actually even make these eggs. I threw this together as a studio trial run at 8:30 last night and then put everything away in the fridge and went to bed. And because I know that this photo wasn't taken on a sunny morning, with coffee brewing and a pan heating up in the background and someone to enjoy the omelette with sitting at the table, hungry--but rather a cloudy darkening evening and a quiet house and the cat trying to climb into the light box, then scratching on the guest room door when I put him away--it doesn't have much magic to me. Part of the magic of a food photograph is that you're transported into a story--the food entices you into a scene, into someone else's kitchen or patio, which you probably don't even see, but the scene fools you into thinking it's there. The food becomes more than just food.

Happily, this morning, I made these very omelettes and Tim and I ate them while looking out at the misty pasture and drinking coffee. Is that the story this photo tells? I can't decide.

Saturday, June 11, 2016

Veggies of June

Just as of last week, I've been starting to really feel like the garden is in--like we have enough vegetables to stop buying them from the store, to stop planning too much for dinner ahead of time. Dinner is anything with greens, turnips, radishes, shallots, sometimes beets, now steadily peas, both snap and shell. Add a can of salmon and an olive oil/balsamic dressing; or cook up some egg noddles and stir in soy sauce and sesame oil. Voila. It is good. 


And yet I've been hung up on vegetables of the future. Our sad, tiny onions.  The beans and the leaf spot on some of their leaves. Our tomatoes suffering in the upside down weather—cool and rainy now that they're getting heavy with green fruit. 

I actually cried about it—in fury at the rain and clouds that stayed away all spring, when I wanted them for peas and lettuce and radishes, and at the sun that beat down on everything endlessly until now, when it would actually be more helpful. 

And then I got a grip. Or, I'm trying to get a grip. Trying to rearrange my focus on the present. On sautés with snap peas, on panfuls of just-hot shell peas tossed with butter. On pillowy mashed turnips. On radish pickles and lots and lots of salad. I can do my best to help the rest of the garden along, but I can't let worries about August keep me from enjoying June. 


Thursday, June 2, 2016

Rye Brownies

This winter my dad sent me a link to Melissa Clark's rye brownies. We get rye flour sometimes from our Bluebird Grains CSA, so I tried these brownies for a party in January. It was love at first bite. These are not kid brownies, and these are not Costco brownies (that Ghiradelli mix—which I do like). These are fudgy, dense, and dark, with a rye snap in the flavor that makes me never want to consume brownies made from all-purpose flour again. I don't think they're for everyone, or even every brownie lover, but they are for me. My soul brownie. 

But they do call for a lot of baking chocolate, and I didn't want to have to buy fair trade organic baking chocolate as often as I wanted to be able to make these brownies (it is just too expensive to be a basic pantry item for me). Fair trade organic cocoa powder is less expensive and goes farther. So I set out to recreate the rye brownie recipe using cocoa powder only. 

I've started keeping a cooking journal where I scribble down recipes—successes and failures and musings and dinner idea lists. I added my first cocoa powder rye brownie recipe to the journal; it was a conglomeration of Melissa Clark's recipe modified by ratios I saw in cocoa powder brownie recipes online. Besides the ratios, I chose to whip the egg whites separately from everything else and fold them into the batter at the last minute, to try to balance out the lack of rise in rye flour. 

Somewhat disappointingly, for I was in a test-kitchen mood, this recipe was completely and totally satisfying. It was Valentines Day, and Tim was sick with a bad cold, and we were watching What's Eating Gilbert Grape, which he had promised me would fulfill my desire for a light and romantic movie to watch that night—and it totally didn't, but it was such an amazing movie that I didn't care, and the brownies were rich and dark and chewy and we ate the whole pan (it was a mini pan). 

But I couldn't just declare my brownie recipe perfect after one iteration. So for the next few months I tweaked and fiddled, tried extra eggs (too cakey), all coconut oil instead of butter (awful! Oddly crispy on the outside!), and a few other things. I kept coming back to that first recipe, with one change: no whipped egg whites. That way, the recipe takes only one bowl, about ten minutes to put together, and zero fuss. It's the kind of recipe that I can now make on whim, with no notice and no trips to the store for several $10 bars of chocolate. Like tonight, when we decided to go on a picnic at the river and I felt that we must have rye brownies to eat. Thirty minutes later, the brownies were done along with the picnic dinner and we were off. At the river's edge, after a nettle-y bushwack and wander through a mostly maple forest with ginormous old-growth stumps here and there, we consumed the brownies and I declared the recipe done. It's a monumental recipe for me—the first baking one I've patched together myself, taken all sorts of notes about and thought about many times, and tried and tested enough to feel confident in it. 

So, without further ado:

Rye Brownies

10 tablespoons butter, plus more for greasing pan
3/4 cup white sugar
3/4 cup + 2 tablespoons cocoa powder
2 eggs
1 1/2 teaspoons vanilla extract 
1/2 cup brown sugar
1/2 cup Bluebird Grains rye flour
1/4 teaspoon salt
1/4 teaspoon baking powder

Preheat the oven to 325 degrees F.

Combine the butter, white sugar, and cocoa powder in the bowl of a double boiler (or a heat-proof bowl set over a saucepan of boiling water). Stir until the butter is melted and the sugar and cocoa powder are smoothly incorporated. Set it aside to cool for a minute or two while you grease an 8x10-inch baking pan.

Then add the eggs, vanilla, and brown sugar, and stir to combine. Finally, add the rye flour, salt, and baking powder. I mound them on top of the butter-cocoa mixture, whisk just the dry stuff with a fork (my lazy way of avoiding getting out another bowl), and then stir it all together. 

Pour into the prepared pan, use a spatula to spread it all evenly, and bake for 23-25 minutes (23 will be fudgy, and your husband might say "these aren't cooked all the way," but you will be happy) until a fork inserted in the middle comes out clean(ish). 

Update, January 22, 2023:

In search of a brownie recipe for Tim’s birthday, I remembered this old recipe and dusted off the blog to check it out. It seemed just right to try again: a one-bowl recipe is even more appealing these days, and we have a plethora of rye flour for our weekly sourdough loaf. I followed the recipe exactly, with one exception—adding a generous handful of chocolate chips. 

Goodness, it turned out delicious! Rich, fudgy, and just the right amount of sweet to counter the rye flavor.

I was wrong on only one point. I said “these are not kid brownies.” Did I have any kids then? Who was I to declare that? My four year old gobbled them up just as happily as me and Tim. 

Maybe in the next iteration I’ll experiment with making them dairy- and egg-free, so my littlest one can partake. 

For now, these are a decadent treat that I will reinstate as my go-to brownie. 


Wednesday, June 1, 2016

Tarragon Radish Quick Pickles

These days, peas are just around the corner. I ate one yesterday, on the last day of May. While the plants have struggled in the hot spring weather and are still short, some just a foot and a half tall, and even though the snap peas didn't germinate fantastically and look scraggly along the fence, with big gaps between them, it was a delicious and satisfying moment. So we might not have as many peas as we hoped--I am happy for what we have! Last year, we didn't plant any.


We planted thirty-two tomato plants outside last night, and the greenhouse--now home to eight tomato plants--feels so spacious sans seeding tables and the mini forest of potted tomatoes that lived on top of them for two months. Don't tell me forty tomato plants is overboard. I still don't trust that they all will make it, not after last year's rotting-tomato-disease fiasco, and this way I am pretty sure, barring wholesale disaster, we will at least have some. And if they all end up producing, I will achieve tomato nirvana.

Meanwhile, we're eating lots of cherry belle radishes, hailstone radishes, and purple-top turnips. When you catch the turnips young, maybe golf-ball size, they are shockingly sweet and sugary, with just a hint of a snap in the aftertaste.


But I wanted to write about cherry belle radishes. These beauties mature after just twenty-five days, which goes by so fast that it's easy to miss them in their prime--as I almost did with the full-grown cache I discovered yesterday. Besides being quick to grow, they are low maintenance and so satisfyingly red and round and juicy. It seems almost a shame to do anything to them besides slice them into a salad--as much as we like sautéing them quickly in butter and eating them just barely translucent and still a little crunchy, any cooking turns that firehouse red color a sort of lame pink. Pickling does the same; the pigments stain their pure-white insides pinkish, too, after about twenty-four hours.

But I can't resist quick pickles--a first milestone in the garden season, when you have some extra to "put up" rather than just enough for a lunch salad or dinner side. I have to put "put up" in quotation marks because, let's face it, the jar will be empty in less than a week!


Tarragon Radish Quick Pickles 
The fresh tarragon adds a hint of licorice, and the longer you let the pickles sit in the fridge, the more licorice-y they will taste. 

I like these pickles as a condiment for stir-fried noodles, especially if you add a little hoisin sauce--the sweetness of the hoisin plus the tangy tartness of the radishes is addictive. Or fold them into a salad with avocado, Gorgonzola cheese, and almonds—the pickles brighten all that richness to make a perfect dinner on a hot June evening. 

About 20 cherry belle radishes, cleaned and sliced thin
A few sprigs fresh tarragon
1/2 cup water
1/2 cup red wine vinegar
1/4 cup honey
A pinch of red pepper flakes

Wash and dry a pint jar, then fill it with radishes. Stuff the tarragon down the sides. In a small saucepan, combine the water, red wine vinegar, honey, and red pepper flakes, and bring just to a boil. Pour the vinegar mixture over the radishes, fit a lid on the jar, and let cool to room temperature. Refrigerate for twenty-four hours before eating.

The quick pickles will keep for a week or two in the fridge.

Monday, May 16, 2016

Tomatoes in June, and Reflections on Meat

I have never been happier for cloudy weather than I am this week. It's not just my Pacific Northwestern blood talking, begging for a break from summer in May. It's sympathy for the topsy-turvy garden. 


Tomato flowers on May 15? 


At the same time as pea flowers? 


We've had radishes, pak choi, several types of mustard greens, spinach, and arugula already bolt and flower after pretty lame harvests or, in the case of the radishes, no harvest at all. We're nursing the onions along only by watering like it's August. But this stretch of cooler weather has every plant unhunching its shoulders and raising its arms to the cloudy sky, heat stress mostly forgotten. 

The upside is that our actual summer crops as well as fall crops, like dry and green beans, summer and winter squash, peppers, eggplant, and potatoes, are already ginormous. Actually, the squash are bigger than the peas. 


And these beauties, which got mostly shade in the afternoons, made it all the way to our plates. 


I guess even if we have to pull even more bolting confused spring crops in the weeks to come, at least our pigs will be happy to eat them. 


We took these three piglets home about a week ago. Believe it or not, they'll be 250 pounds in a few short months (right now they're about the size of our cat). Until then, we plan to pamper them with an expanse of woods to root around in and a lot of organic feed. They'll live kingly and queenly lives, as far as pigs go. And then they'll pair perfectly with those winter squash and potatoes in early November. 

It's funny, a few years ago I'm not sure I would have approved of a statement like that about baby pigs. I would have squirmed to think of them as future food. But raising our own animals for meat has changed my perspective. Now meat is not just vacuum-sealed protein to buy in a store. Meat is mornings spent striding through dewy pastures carrying buckets of grain and salt, and the baaing hellos of ewes and lambs that nose up to my legs and nibble my work jeans. Meat is the chickens who wander free around our yard and the pastures, forming subgroups and cliques that we nickname and gossip about at dinner. (Have you seen the Deputy recently? He's always hanging around the Three Stooges now.) Meat is planning—electric fence line or hog panels? Can three piglets fit in the back of the Jetta? Meat is poring over YouTube videos on butchering techniques and researching charcuterie recipes and planning what cuts we want to eat, sharpening knives and buying butcher paper. Meat is the fascination and art of transforming a whole side of pig or lamb into cuts that we wrap and mark with sharpie and store up in the freezer and carefully cook through, one at a time. Meat is knowing our animals lived well, ate well, were healthy and honored, and in turn give us nourishment we feel right about.

So it has its messy parts. There's no way to romanticize plucking a chicken or scalding a pig. But my life is infinitely richer for the animals we raise, in their lives outside and in their lives in our freezer. The dots connect. 

Not everyone can or wants to raise animals for themselves. But it's driven home, for me, more than any book or article, how deeply important it is to care about the meat you eat and the animals it comes from—at the most basic, were they given the space they need, fed food they naturally want to eat?—and to use your purchase power to communicate that care. 

Soapbox over. 


Wednesday, May 4, 2016

Sprouts

Apparently the last few months my blogging energy has hovered around zero...or a little higher if you count posting pictures and no words as blogging. 

I struggle with sitting down at the computer to write or read after work. After a solid day of editing, it's just not appealing. Although we do watch Netflix sometimes on my computer. So perhaps my excuse is not valid. 

Things are a little crazy on the homestead. There's just so much to do. Planting, weeding, watering, tending in the garden; chickens, sheep, soon pigs; a lot of work on the truck (not my realm, but still); and a number of unfinished yard projects. We are frazzled. In a good way though. I find nothing more satisfying than discovering the hunched shoulders of a bright-green bean shoot in the morning and finding it shooting for the sky in the afternoon. 


Friday, March 11, 2016

Nettle Tea


Up until last week, I have always tried to stay away from this spiny dragon of a plant. It triggers unpleasant memories, like when I squatted down to pee in the woods at Hogsback and basically sat on one. 


But this week I sought it out, armed with bright pink rubber gloves and a big bowl. It's hard not to jump on the fresh nettle train when the shady part of the pasture just steps from my back door is full of them, just three or four inches tall--so many that my friend and I, after picking for an hour, processing, and then coming back for more, couldn't even tell where we'd harvested. We were inspired by a local homesteader, Corina, whose blog I love to read. She just recently wrote about nettle pesto, and we had to try her recipe. Eight batches of it. 

It is delicious enough to snatch a cube of it from the freezer and pop it into your mouth plain, as Tim can testify. 


I also tried dehydrating lots of it for nettle tea. Stacked full, the dehydrator only takes a few hours to turn the leaves shriveled and crackly. I use the very scientific recipe of about one teaspoon dried leaves per mugful of water.


The flavor reminds me of green tea, earthy and somewhat spicy and spinachy. Spinachy tea doesn't sound super delicious, I know, but I have found it quite addicting. Apparently it also has superpower health benefits. I feel much more friendly toward nettles now, at least until summer, when they'll be thigh-high and I'll want to walk around in sandals.